
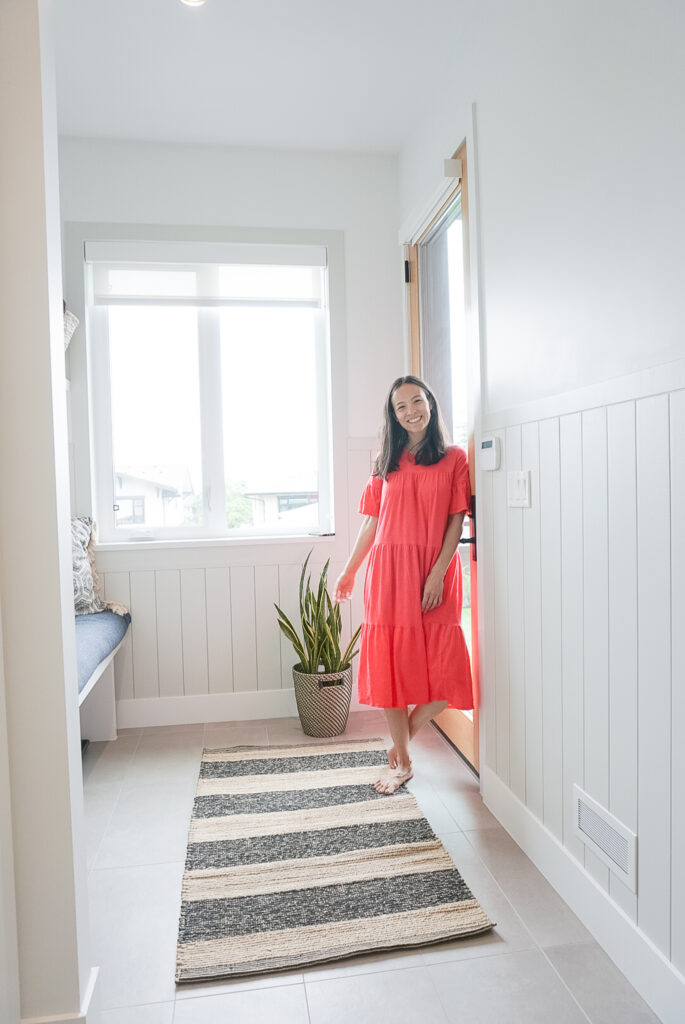
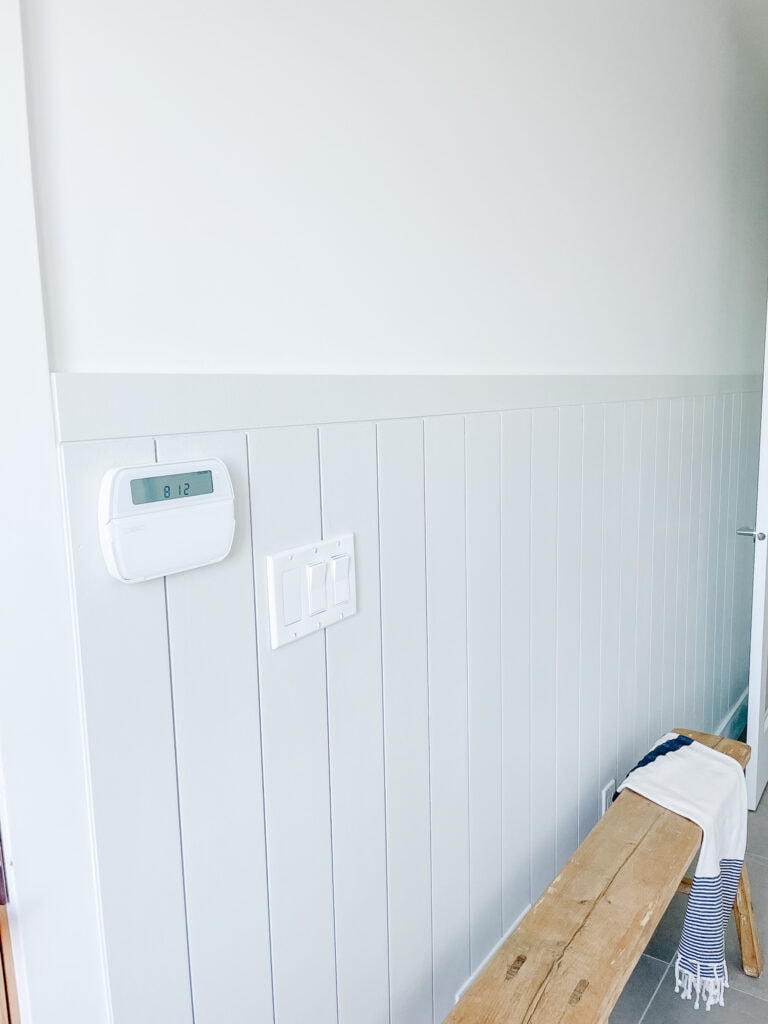
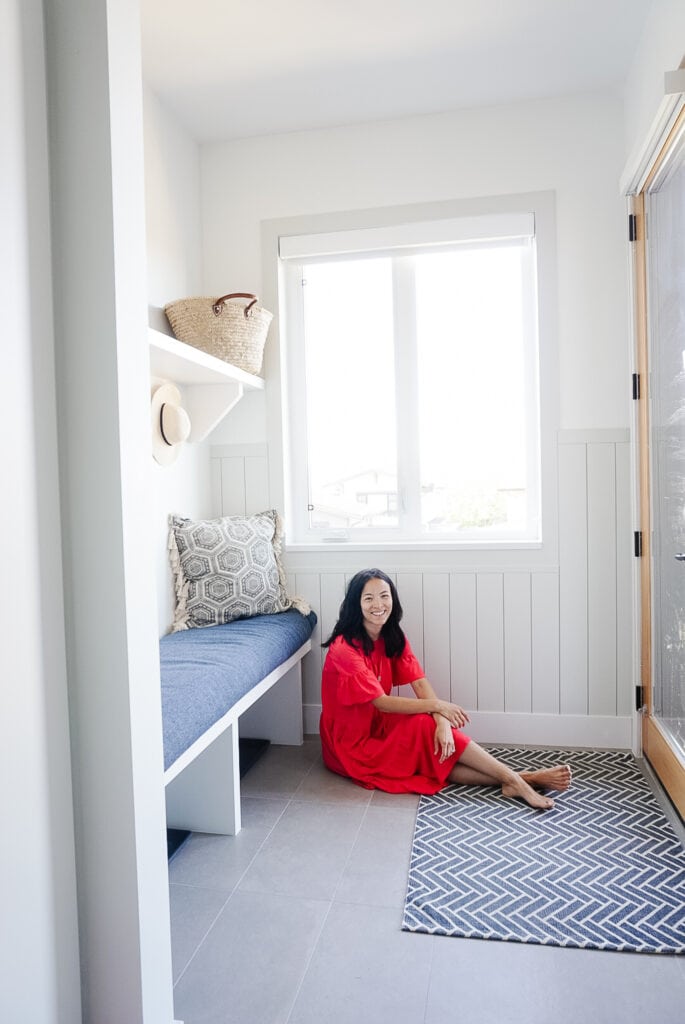
My shiplap wall is done done done, and I couldn’t be more in love with how nicely it warms up the room. Now, if you want to tackle your own, this is the post for you because I’m here and ready to teach you how to shiplap your own walls.
I’m going to start with the fact that you can 100% do this on your own, and the following is not meant to discourage you but set you up for success.
To shiplap your walls at home and make them look like a professional did them, you need a lot of patience and a strong eye for detail. The smallest little things will make all the difference here. That means thoughtfully planning out your space, spending a ton of time making sure your cuts align perfectly, carefully caulking the seams, and so much more. If you’re committed to trying, needing to pivot, and trying again, you can 100% do this. There were so many “what the fucks” in this project that I can’t even count them. But I can tell you that I was fully committed to getting this done and doing it perfectly. This is why I got the result that I did – I didn’t give up, was excited by the trials and errors, and working through figuring this out.
Space Planning For Shiplap
Ask yourself all of these questions before getting started. Then you can start measuring out how much shiplap you will need.
You still with me? Great! Let’s get into how to shiplap your own walls.
First, let’s start with space planning:
You’ll need to understand how much shiplap you’ll need – that’ll depend on the size of your walls. How wide are they? How many walls are you doing? How high up the wall are you going? What width of shiplap do you want to use? Are you working around fixed objects (a bench or a window, for example)? If you’re working around the fixed objects, how are you going to work around them?
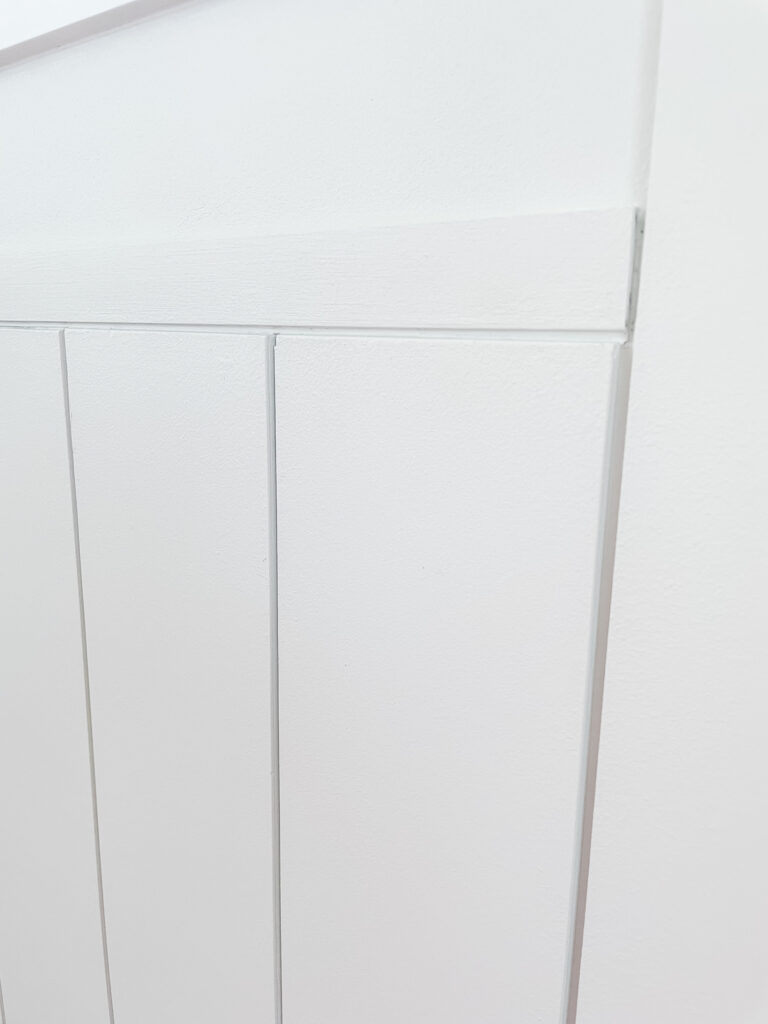
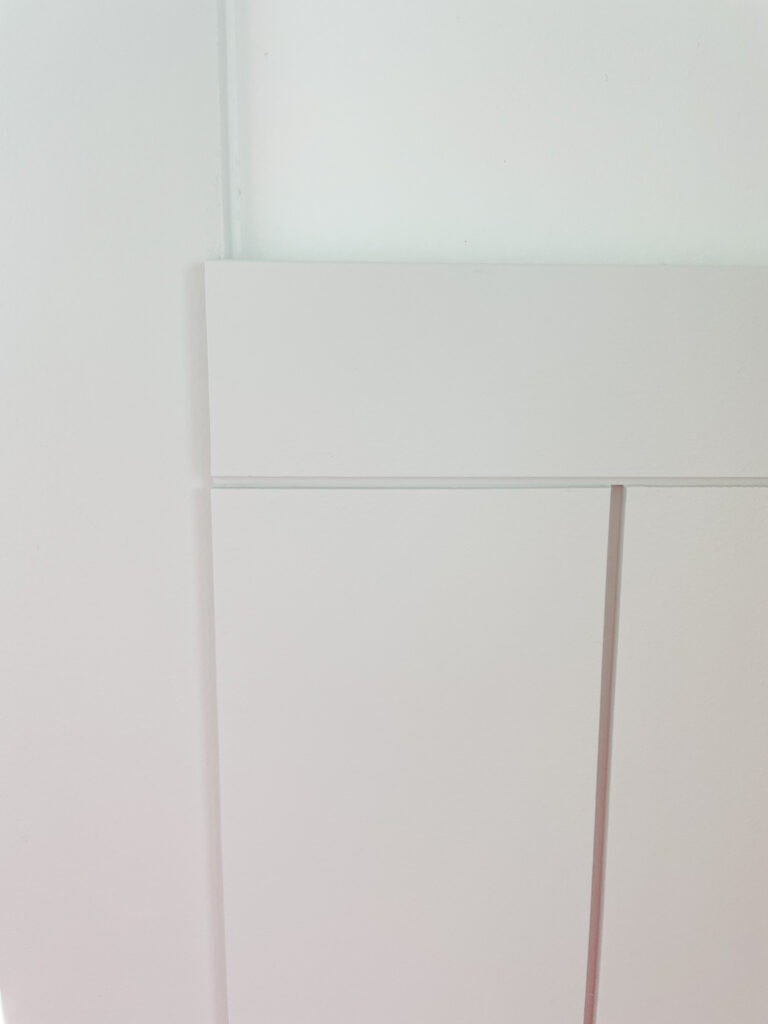
Some of the more intricate details of my space are pictured below. I added a trim around the window and a top cap above the shiplap boards. On both of those pieces, I created a reveal with the table saw (and the blade sticking up the tiniest bit), to mimic the spacing of the shiplap.
I bought 6inch wide pine shiplap with a tongue and groove profile. Pine was $120 more than MDF for my space. Because our mud-room is high traffic, I wanted something that would hold up to a little more destruction than MDF would so felt it was wroth the extra splurge. I also got a pre-primed shiplap which saved me a ton of time and effort. Given the shiplap comes in 12 foot lengths, I opted to go 4 feet up the walls. In measuring how many boards you’ll need along the length of the wall, you need to remember that the tongue and groove make you lose some of the thickness (so my 6 inch wide planks turned out to be closer to 5.5 inches because of the pieces that slot in behind the other).
DIY Shiplap
Materials You Need:
+ Pre-primed tongue and groove shiplap board (pine or MDF, the choice is yours)
+ Pre-primed 3-inch board – pine or MDF (if you’re doing a top cap like me)
+ 2.5 inch nails
+ Liquid glue (optional, I opted no to glue these boards)
+ Wood filler
+ 220 grit sanding block
+ Caulk
+ Pant + paintbrush
Tools You Need:
+ Mitre saw
+ Table saw
+ Jigsaw or oscillating multi-tool (if you have outlets, and other things to work around)
+ Nail Gun
+ Caulking Gun
+ Carpenter’s Triangle
+ Stud Finder
Instructions:
- Clear out your workspace. Clear the walls of anything hanging, any carpets on the ground, etc. Turn off the power and remove any electrical outlet or switch covers. Make sure you have an area that you can work around quickly.
- Make your shiplap cuts using your mitre saw. My long wall had all 4-foot long cuts, so I made 26 (based on the length of my wall) 4-foot cuts (knowing that I would have some minor cuts to make once I started placing them on the wall).
- At the start of my long wall, I needed to take the table saw and rip a cut lengthwise to remove the groove part of the plank. I then took the plank and added that small reveal (pictured above) to match the spacing of the shiplap. This was done using the table saw with the blade just barely poking through.
- Once you have your first cut board ready, start placing your shiplap along the wall.
- Once you hit items like outlets, light switches, etc., grab a piece of paper and trace the existing cut-out. Using your scissors, cut the traced are of the paper out. This is now your reference piece. I always double-check that my tracing skills were accurate. So, place the paper in front of the opening and check that you’re not bigger – smaller is generally better – if your template is bigger, trim it down.
- Now, place your board where it belongs on the wall (flush and pushed far into the board beside it. Align your template with the cut-out on the wall and place it on top of the board. Take a pencil and trace out the lines you need to cut. Make those cuts using your multi-tool or jigsaw, or whatever else you have that might work.
- Repeat this process until you’ve reached the end of the wall. Once you reach the end of the wall, you will likely need to make another rip lengthwise to complete the space.
- Check that the lengths at the top of your shiplaps line up and if not, make small cuts to align them.
- If you’re doing a top cap, cut it to the proper length, add a reveal (with a tiny bit of the table saw sticking out) at the bottom and side.
- Now, I painted my boards here – I don’t have a sprayer and knew I wouldn’t be able to get the tongues painted if they were way back in there. So, I did two coats of paint on the tongue and one on the front to make it easy. When I removed the planks from the walls, I numbered each of them to know exactly where they went.
- Once the paint was dry, I placed the boards back on the wall and started nailing them in. The fit is so snug in my mudroom, and there is no moisture, so I decided not to glue it on and only nail it in. I did find the studs and made sure that we hit the studs as we went along.
- Once I nailed in each plank, I took my wood filler and filled the nail holes. Once it was dry, I sanded it down. I then taped all of the seams off to caulk everywhere. In the tighter to reach places, I used a q-tip and baby wipes to get in there.
- I then did my final coat of paint and voila! You have a shiplap’ed wall!
- For more challenging zones, like around the window, I framed it with the groove part of the tongue and groove. This meant I needed to rip a board lengthwise to get my groove part on the bottom of the frame. I also added a reveal to this piece. I also needed to flip the boards partway through to get the full-frame around the window. So, I created another piece that matched up with the tongue portion of the tongue and groove so you literally couldn’t see the difference.
It’s all about the details, and while every space will be different, I’m here to help! So if you have any questions, pop them below!

Have you seen my feature wall addiction yet? It's coming in strong. I've done a modern board and bat
You're mentally ready for spring, but is your garden?! It totally needs something more. Perhaps a cu
The second book display has entered the building! After my first smaller book display (following the


Chelsea
What paint colour did you go with?! (Walls and shiplap) It’s soooo beautiful